Plugin Installation Guide
Plugin Installation Guide
This document provides step-by-step instructions for installing plugins developed by Webiant. Please note that certain plugins may require the ,Webiant Core plugin to be installed beforehand.
This guide applies to nopCommerce version 4.20 and above.
Installation Steps:
- Download the Plugin Package
Download the required plugin package from our official website www.webiantinfotech.com
- Access the Local Plugins Section
Log in to your nopCommerce admin panel, navigate to Configuration > Local Plugins.
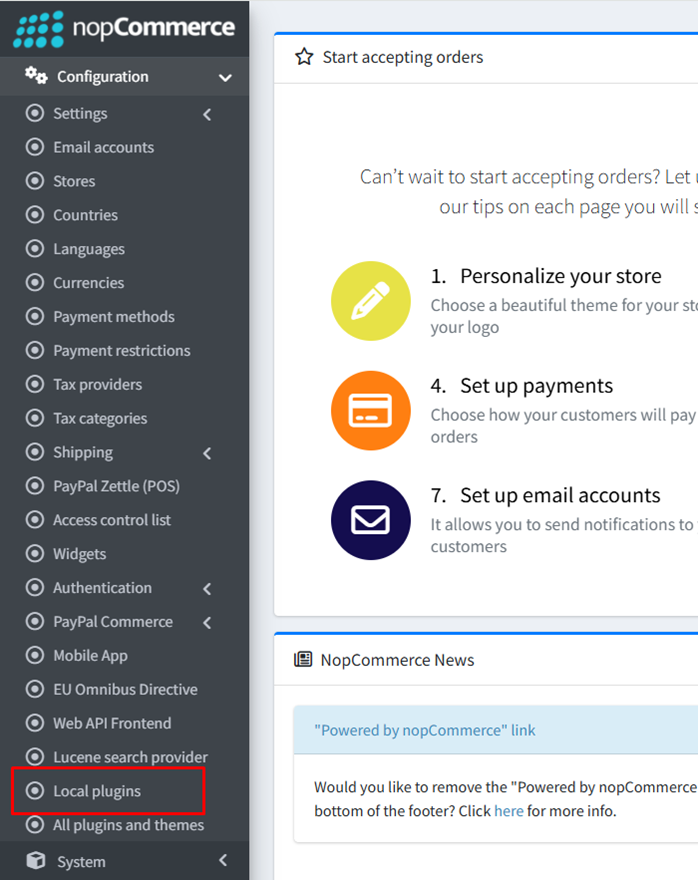
- Open the Local Plugins Page
After clicking on Local Plugins, the corresponding page will open on the right-hand side of your admin panel.
- Upload the Plugin Package
Click the Upload plugin or theme button.

- Select and Upload the Plugin
In the pop-up window, click Choose File, select the plugin package you downloaded in Step 1, and then click Upload plugin or theme. After successful upload, a notification will appear confirming the upload. Click Restart application to apply changes.

- Locate the Uploaded Plugin
Once the application restarts and the Local Plugins page reloads, locate your uploaded plugin in the list. You may filter by Group using the Webiant option.
- Install the Webiant Core Plugin First (if required)
If you see the Webiant Core plugin listed as pending installation, ensure it is installed before proceeding with other Webiant plugins. If it is already installed, you may continue with the plugin installation.
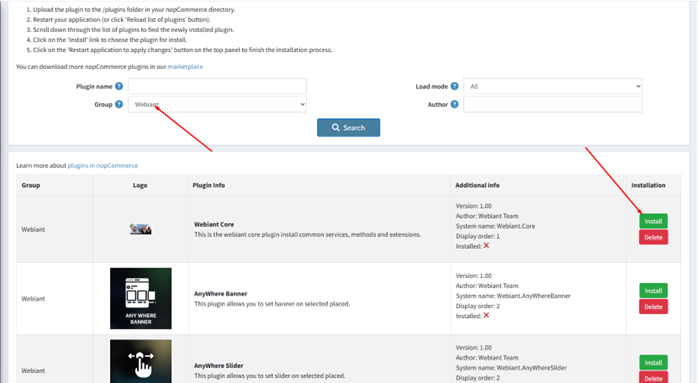
- Install the Desired Plugin
Click the Install button next to the plugin you wish to install.

- Restart the Application After Installation
After installation, the page will refresh, and a success message will appear. Click Restart application to apply changes once again.

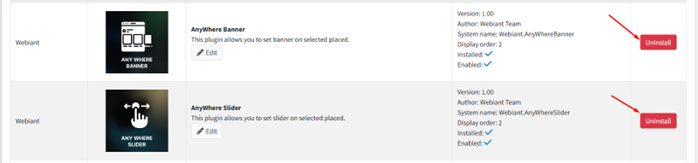
- Verify the Installation
Once restarted, confirm the plugin has been installed successfully by checking its status on the Local Plugins page.